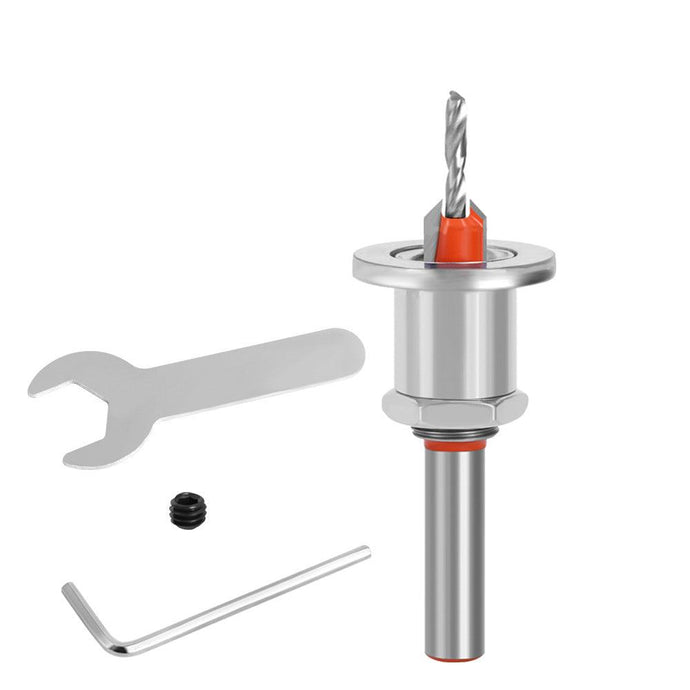
In the world of woodworking, achieving a clean, professional finish often hinges on the details. One of those essential details is the use of a countersink bit, a tool designed to create smooth, angled holes for screws and bolts to sit flush with the surface of wood. While it may seem like a small component of a larger project, a countersink bit can make all the difference in terms of both aesthetics and functionality. Whether you're building furniture, installing hardware, or finishing a carpentry project, knowing how to select and properly use a countersink bit is key to getting the best results.
A countersink bit is specifically designed to cut a conical shape at the top of a hole, allowing the head of a screw or bolt to sit flush with or slightly below the surface of the wood. This feature not only contributes to a cleaner, more polished appearance but also prevents the screw head from catching on surrounding surfaces, which can be particularly important when building items like cabinets or flooring. The countersink itself is made up of a series of sharp, angled cutting edges that gradually widen the hole, ensuring the screw will fit securely and without excessive force.
The primary function of a countersink bit is to create a smooth, tapered recess at the entry point of a drilled hole. This enables screws to sit properly and securely, which is especially important when working with softwoods or materials that might otherwise cause the screw to slip or not hold as firmly. The bit's unique shape allows it to remove just enough material to create the recess while leaving the surrounding wood undisturbed. This ensures that screws will be driven in evenly and that the surrounding wood fibers will remain intact, preventing splintering or damage around the hole.
When selecting a countersink bit for woodworking, the first thing to consider is the size of the screw you plan to use. Countersink bits come in various sizes and angles, so choosing the right bit ensures that the screw will fit correctly and provide a strong, reliable hold. For instance, a larger countersink bit may be necessary for screws with larger heads, while a smaller bit would be ideal for fine, delicate screws. It's important to match the countersink bit's size with the size of the screw head to achieve a smooth, flush finish. Some bits come with adjustable depths or guides to help achieve consistent results for different screw sizes, making them versatile for various tasks.
Another key factor to consider when selecting a countersink bit is the angle of the cone. Most countersink bits are designed with a 82-degree angle, which matches the standard screw head angle found in most wood screws. However, other angles, such as 90 degrees or 100 degrees, are available for specialty screws or projects that require a different fit. The angle you choose will depend on the type of screw you're using and the look you want to achieve. The 82-degree bit is the most common, as it works well with the majority of screws used in woodworking.
Countersink bits are made from a variety of materials, with high-speed steel (HSS) and carbide-tipped bits being the most popular choices. High-speed steel bits are durable and work well for most standard woodworking projects, providing a good balance of performance and affordability. For tougher materials or more frequent use, carbide-tipped countersink bits offer superior durability and longevity, staying sharp for much longer than HSS. While they tend to be more expensive, they are well worth the investment for professionals or hobbyists who work on larger projects or use the tool frequently.
In addition to selecting the right size and material, it's important to use the countersink bit correctly to ensure the best results. When using the bit, it's crucial to apply consistent, even pressure to avoid damaging the wood or creating uneven holes. The countersink bit should be used in combination with a drill to create the initial hole, and the countersink bit should follow immediately to create the tapered recess. Be sure to keep the bit perpendicular to the surface of the wood to ensure a uniform, clean cut. Many woodworkers also recommend using a drill press for added stability and precision when working with a countersink bit, especially when working on more delicate or detailed projects.
While countersinking is an essential part of many woodworking tasks, it's important to understand its limitations. Some woods, particularly softwoods, can splinter when countersunk if not handled properly. It's recommended to drill a pilot hole first to guide the countersink bit and reduce the chance of damaging the surrounding wood. Additionally, when working with hardwoods, it's important to take your time and avoid forcing the bit into the material, as this could result in uneven cuts or a poorly finished hole.
Ultimately, a countersink bit is a simple yet invaluable tool in a woodworker's arsenal. Whether you're creating a sleek finish on a custom cabinet, building furniture that requires precise screw placement, or simply installing hardware with care, the right countersink bit ensures that the job is done with precision and professionalism. By understanding the different types of countersink bits, choosing the right size and angle for your project, and using the tool correctly, you can elevate your woodworking projects with ease and confidence, creating clean, flush finishes every time.


